*** Enter discount code FURNITURE10 at Checkout for savings on selected Dolls House Furniture ***

Login Details
New Account
(We will never divulge your email to a 3rd party)

Not logged in
Your shopping cart is currently empty


FREE DELIVERY
When you spend £40 or more

SAME-DAY DESPATCH*
When you order before 2.00PM

COMPETITIVE PRICES
Low
Prices & Special Offers

SATISFACTION GUARANTEE
14 Day return policy

Home » How-to Guides » Dolls House Lighting Guide
Introduction to Wiring and Lighting a Dolls House
If you've never
installed dolls house lighting before it may seem
like a daunting task, but it's probably easier than you think and
hobbyists can generally complete the task relatively easily and safely without any
specialist knowledge. Dolls house lights make a very attractive
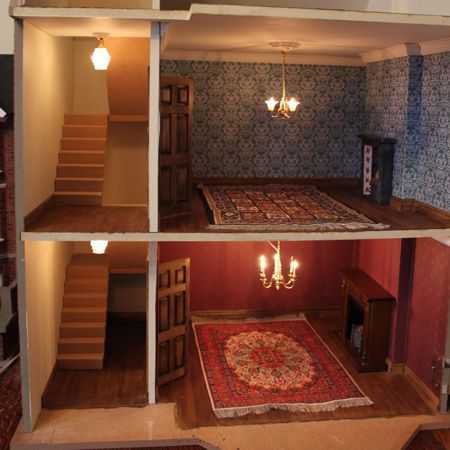
addition to any dolls house, creating lighter rooms and a warm
'lived in' glow so the interior can be fully appreciated.
If the dolls house is intended to be played with by young children then lighting may not be recommended as most light fittings are quite delicate so could easily become damaged through. In this case lights can always be added later and it may still be a good idea to make provision for wiring..
It is important to to plan your lighting and wiring during the early stages of a dolls house project and do the necessary preparation work before you start the building and decoration, so you can ensure the wiring is completely hidden from view when the it is finished.
Dolls House Battery Lights vs Wired 12V Lights
A recent development in dolls house lighting is the introduction of
LED battery
dolls house lights. These lights need no wiring as they have
their own replaceable 3V battery so they can simply be positioned
wherever required in the house and switched on and off when
required. Ceiling lights are generally attached using disc magnets
so they can easily be removed and replaced. This offers obvious
advantages over wired lights, but there are also disadvantages.
For example, each LED battery light will need to be switched on and
off individually which can be fiddly and inconvenient in a large
dolls house with many lights whereas wired lights are generally
controlled by a single master switch or optional individual
switches. Also the batteries will need to be replaced
periodically although with low power LED bulbs the batteries
generally
last for many hours. LED lights are a popular choice in smaller dolls
houses or in places where wiring access is difficult. Whatever your
preference it's worth giving this option consideration.
Dolls House Wiring Methods
For wired lights there are two main wiring methods to
consider from
when planning your dolls house electrics - twin round wire or
flat copper tape (or a combination of the two). We find that the
twin round wire method is more popular as it is simpler and offers a
great deal of flexibility, so this guide
will mainly concentrate on this method. We sell dolls house wiring components
for both systems and will provide an overview of the methods
used for each, however, every project is different so you will need
to work out the best way to tackle your particular dolls house
lighting installation depending on the position of the lights and personal
preference.
Planning Your Dolls House Lighting and Wiring Installation
Generally it is best to start by deciding on which lights you intend to
install in your dolls house and the position of the lights. Then you
need to decide which wiring method you intend to use and which wiring
components you will need to use to connect everything together. Once
this is decided you need to work out the best way to route the wires around
the dolls house to power the lights. A common method is to cut shallow
grooves in the floors so wires can be run from the supply to ceiling lights
in rooms below ..the wires can then simply be taped over and hidden under
floorboards or carpet. It is easier to cut the wiring grooves before
assembling the dolls house where possible.
Dolls House Wiring Using the Twin Wire Method
This is the simplest and our preferred method for dolls house
wiring. You will need a
12v power supply, a
fused socket connector strip and the individual dolls house light fittings. These can be purchased individually or as a
dolls house lighting kit. Several types of socket connector strip are available with
optional single master switch or individual switches
so each dolls house light switches on and off independently.
When choosing a power supply you must ensure that its capacity is
sufficient for the maximum number of bulbs you are likely to fit in
the dolls house - this
information is shown on the website page for each power supply.
When installing the lights in the dolls house the first step is to decide on their position in each room. Lights for dolls houses come in many types from miniature chandeliers to wall lamps to table lamps to glowing fires. Dolls house light fittings are usually supplied complete with a wire measuring about 450mm and two pin plug attached. When fitting the dollhouse lights the plug can be removed from the wire by removing the pins with pliers, this will allow the wires to be passed through small holes as necessary and the plug can then easily be reattached. Dolls house chandeliers and other ceiling lights are usually fitted in the Centre of each room. To do this you should first mark the exact position of the light and drill a small hole through the ceiling to the floor above so the wire from the light can be passed through. You then need to cut a small groove along the floor from the hole to the back of the house using a router or other suitable cutting tool. Finally drill another hole so the wire can be passed through the back of the dolls house. Wall lights, table lamps etc can be installed similarly, finding the most suitable path to route the wires to the back of the dolls house. It is usually easier to cut the necessary channels for the dolls house wiring before the dolls house is assembled.
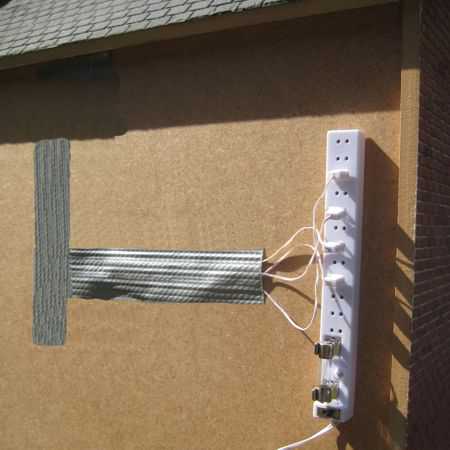
The socket strip is usually located on the back of the house. When all the dolls house lights are fitted and the wires routed and hidden the two pin plugs can be reattached and plugged into the socket strip. Finally the transformer should be connected and the lights tested. You should do the preparation work for the dolls house lighting before building and decorating the house if possible, but it's probably best not to install the actual dollhouse lights until later on in the building and decorating process as some are quite delicate. It is worth bearing in mind that you may need to access the dolls house lighting wires in future after building and decorating so if possible wires should be accessible with the minimum or disruption to the dolls house.


Separate Dolls House Wiring and
Removeable Lights
Dolls house lights are generally supplied with a length of
wire and plug attached. This makes them very simple to install and is very
convenient for simple applications, but from time to time it may be necessary to replace bulbs or to replace a damaged or faulty light fitting
and this can be difficult to do and may cause damage to the dolls house decor.
For this reason we recommend installing wiring in the dolls house as a
standalone fixture with sockets allowing light fittings to be connected directly
where required.
Sockets
and
back plates
allow easy installation and removal of dolls house lights without damaging the
decor.


Flat Copper Tape Wiring Method
Flat copper tape can be used in a variety of different ways
to create dolls house wiring circuits. The flat copper tape has a
self-adhesive backing so can be fitted inside the dolls house behind
decor or under floors. Most commonly it is applied to the outside
of the back wall of the dolls house to distribute power from the power
supply connection point to each floor of the house. Separate
lengths of copper tape can be connected easily by driving a brass eyelet
through overlapping tapes where an electrical connection is required.
Electrical continuity can be tested using a test probe. The wires
from the lights can be connected to the tape at the back of the house,
usually using solder joints. This method results in a neater
finish at the back of the house compared to the twin wire method as
there are no trailing wires.


Troubleshooting
Dolls house lights should always be tested before installing in the
dolls house to make sure they are working so any problems can be
resolved.
...Things to check if your dolls house lights don't
work.
Everything connected and switched on - It may sound a obvious, but it's worth checking that the dolls house lighting transformer is plugged in and switched on, the transformer is connected to the socket strip correctly and the socket strip is switched on and that the dolls house light fittings are plugged into the socket strip.
Dolls house lighting fuse - Check the fuse on the dolls house lighting socket connector strip. THE DE074 and similar cocket strips have a fault indicator light which is designed to illuminate only when lights and power are connected and the fuse has blown.
Bulbs securely fitted
- Check that the dolls house light bulbs are screwed in or pushed in firmly. The dolls house light bulbs often work loose during transit and installation so this is a common problem resulting in the dolls house lights not working. With many dolls house light fittings it may appear difficult to access the bulbs, but in most cases the lampshades can be removed by carefully unscrewing or unclipping to gain easy access.2 Pin plug securely connected - Check that the twin wire is connected properly to the 2 pin plug and that the plug is connected to the socket strip properly.
Other Faults - Other dolls house wiring faults will need to be resolved by testing each component and connection in turn until the problem is located. Loose connections can usually be located by gently moving the wires, connections and light fittings until the fault occurs. If one particular dolls house light doesn't work you can usually swap the bulb with another light to establish whether the bulb or the dolls house light fitting is faulty. Dolls house light fittings and wires are very delicate so it is important to handle them carefully. If a dolls house light fitting becomes damaged it may not be possible to repair, in which case a replacement may be the only option.
Tip - It is very easy to damage a bulb or blow a fuse when installing and setting up dolls house lights so it is a good idea to order some spares in case they are needed.


