*** Enter discount code SAVE10 for savings on selected Dolls House Building & DIY ***
Not logged in
 
icon

FREE DELIVERY
When you spend £40 or more

icon

SAME-DAY DESPATCH*
When you order before 2.00PM

icon

COMPETITIVE PRICES
Low Prices & Special Offers

icon

SATISFACTION GUARANTEE
14 Day return policy

Product Directory


Information & Guides

Dolls house project reviews, how-to guides and helpful information.
See more»
 

Home » Dolls House Projects » Kitchen Range Surround

Dolls House Kitchen Range Surround

Project review by Bromley Craft Products

See how we built the kitchen range chimney surround kit and transformed it into a realistic brick finished model

This step-by-step guide shows the method of applying two layers of Realistic Brick Compound, one for the mortar colour and one for the brick finish.  Usually we only apply a single layer of compound so the painted background is visible in the mortar joints, but adding a layer of compound for the mortar provides a more detailed realistic effect. We recommend using this method when the best close-up detailed finish is required.

Step-by-Step Guide to Creating Realistic Brick Finish with Realistic Mortar Joints
undecorated dolls house range surround kit
The kitchen range kit consists of precision cut MDF parts and wooden mouldings.  An optional decorating kit is available which includes many of the materials shown here which can be used to create the realistic finishes shown.  This kit can be purchased from our website - for details click here>>.  This range cooker shown is not included in the kit but can be purchased separately click here>>.
Decorated dolls house range surround kit
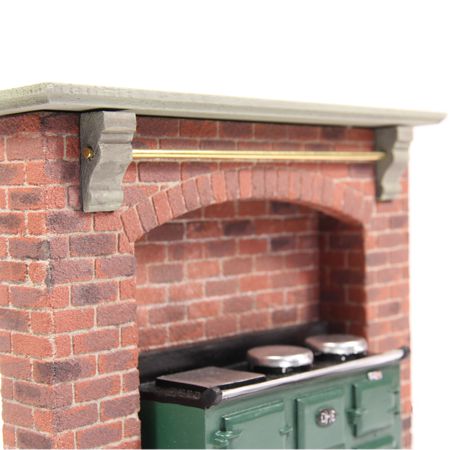
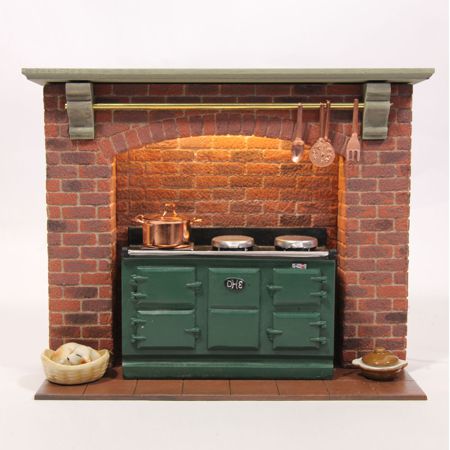
The photo above shows the finished model with realistic brick finish created using Realistic Brick Compound.
kit parts
Photo shows the MDF and wood parts before assembly and finishing.
Assembled kit parts
Here the main parts have been assembled and glued together using PVA adhesive.  The surfaces have then been primed and painted using matt emulsion paint ready for brick compound application.
Paint the kit parts
Masking tape is applied where the wooden mouldings fit on the surface.  This will allow the mouldings to be glued in position after brick application.
kit parts
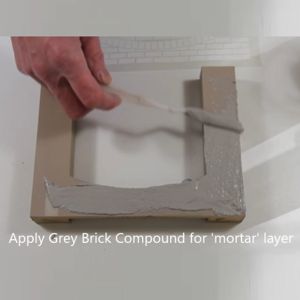
On this model we applied a layer of grey compound first to create a textured mortar effect.
Assembled kit parts
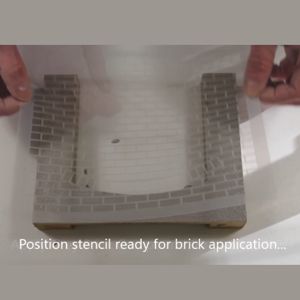
Immediately after applying the grey mortar layer whilst it is still wet the stencil is placed in position.
Paint the kit parts
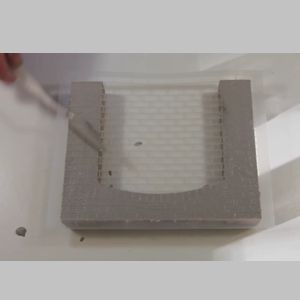
The stencil is pressed down firmly to embed it in the compound and prevent seepage when applying the red brick layer.
kit parts
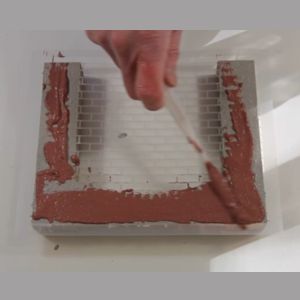
The red brick compound is then spread evenly over the surface.
Assembled kit parts
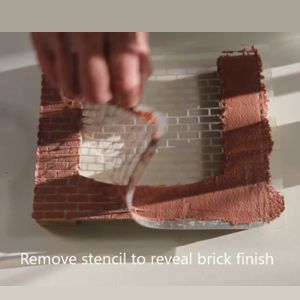
Remove the stencil to reveal the brick effect.  This can be done straight away whilst the compound is still wet.
 
The remaining surfaces were bricked by repeating the process shown.

When complete and the brick compound has dried it can be lightly sanded if required to remove any rough or uneven areas.

The brick finish was then sealed using clear matt varnish and finally shading was added using acrylic paints to cleate the varied brick colours.

The quarry tiled hearth was finished using acrylic paints and varnish.
Video shows application of the realistic brick compound finish using a stencil.
 
kitchen range with brick finish
After the brick compound has been applied to all surfaces the remaining parts were assembled to complete the model.  The brick finish was then sealed using clear matt varnish and finally shasing was added using acrylic paints to cleate the varied bsick colours.
Finished kitchen range kit
An LED strip light was added to light the stove top.  Here it is shown with a tile sheet in place of the brick finish on the back wall.
Finished kitchen range kit with realistic brick effect
The dolls house cottage garden kit consists of precision cut MDF parts and wooden mouldings.  An optional decorating kit is available which includes many of the materials shown here which can be used to create the realistic finishes shown.  This kit can be purchased from our website - for details click here>>
Realistic Brick and Stone Finishes for Dolls Houses

To view a more detailed application guide click here.  To view various projects and magazine features click here.  To view more photos click here or view our flickr page here.  If you have viewed all the information on the website and still have questions please contact us.

Click links below for more information...